Before we tell you exactly how to build more muscle by manipulating muscle failure in your workout, allow us to break it down scientifically. Muscle failure is defined as the point in a set when you can’t perform another rep with proper form. And while there’s much debate over whether training to failure boosts strength, it’s absolutely crucial for inducing growth. Going to failure (and beyond) signals the body to produce more critical anabolic hormones and growth factors such as growth hormone (GH), testosterone and insulin-like growth factor-1.
The further you can take a set past failure, the higher you can increase levels of these natural muscle-building hormones and the further you can push muscle growth.

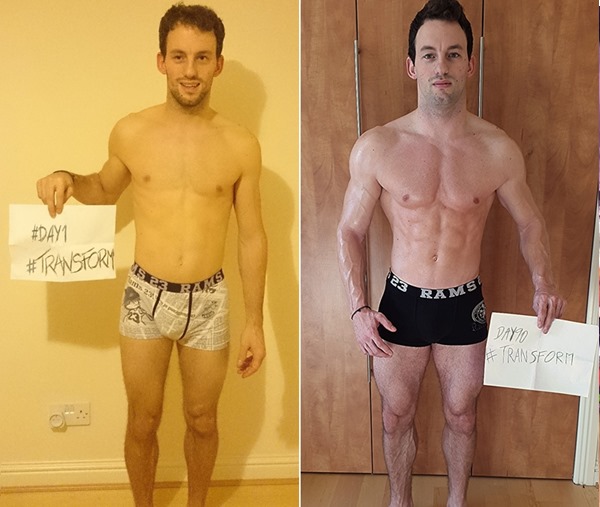
Photography By: Alex Ardenti
To Failure And Beyond
Taking a set to failure is pretty straightforward: Go until you can’t go anymore, then stop. But training past failure can be done a number of ways.
The following six techniques are proven to be the most effective, so get acquainted with these intensity-boosters and push your hypertrophy to new heights.
1 Drop Sets
As the name implies, drop sets involve decreasing the amount of weight you’re using after you reach muscle failure. It’s a fairly simple premise, but you want to make sure you lighten the load by the proper amount. A study conducted by the Weider Research Group found that when trained subjects reduced their weights by 20%-30%, they could complete roughly the same number of reps (nine reps for a 20% drop and 11 reps for a 30% drop) as they did before reaching failure (10 reps). The number of reps you complete on each drop set is important for triggering adequate GH production and mechanical stimulus to incite muscle growth.
Too few reps may not boost GH levels high enough, while too many may mean the resistance isn’t heavy enough to overload the muscle and produce growth. So be sure to drop the weight by 20%-30% to stay within your rep range and maximize results.
Prescription:
Add 1-2 drop sets to the last 1-2 sets of each exercise.
Tip:
Drops sets work best with dumbbells or selectorized weight machines. They allow you to reduce the weight in minimal time, which keeps intensity high.
Drop-Sets Shoulder Workout

2 Extended Sets
Extended-sets training involves doing increasingly easier variations of an exercise as you fatigue to allow you to continue past failure. Each successive alteration places your body in a stronger biomechanical position than the previous one so you can use the same weight throughout the set. Here’s how to apply it to dumbbell incline presses: After you reach failure, adjust the bench to flat and continue pressing. Once you fail on flat presses, immediately move to a decline bench and go to failure again. On presses, you’re stronger on a flat bench than you are on an incline, and you’re strongest on a decline bench.
So even after you reach failure on incline presses, you can continue pressing the same weight on a flat and decline bench. Extended sets can also be done on barbell or Smith machine presses and dumbbell flyes.
Prescription:
Do 1-2 extended-set complexes per workout for 3-4 sets each.
Tip:
Don’t decrease weight within an extended set, even if your reps drop with each variation. Just go to failure and keep moving.
Extended-Sets Chest Workout

3 Forced Reps
It’s easier to train past failure using forced reps than it is with drop sets and extended sets. Just rep out to failure, then have a spotter help you complete 2-4 more reps. Research from Finland shows that forced reps work because they boost GH levels higher and recruit more fast-twitch muscle fibers than when you stop at muscle failure, which results in greater hypertrophy over time. The key to forced-rep training is the amount of help the spotter provides after you reach failure.
If he supplies too little assistance, you won’t be able to complete the number of forced reps needed to stimulate muscle growth; if he provides too much assistance, the reps will be too easy and your muscles won’t be sufficiently overloaded. The spotter should contribute just enough help to get you past the sticking point of each rep but you’re still doing the majority of the work.
Prescription:
Perform 2-4 forced reps on the last 1-2 sets of most exercises.
Tip:
If you train alone but want to try forced reps, do unilateral exercises. After reaching failure, assist yourself with the opposite arm or leg.

Forced-Reps Bicep Workout

4 Negative Reps
Negative-rep training is another method with which it’s critical to have an experienced spotter. Go to failure, then have your spotter lift the weight through the positive part of the rep. Continue by performing the negative part of the rep very slowly 3-5 seconds then have your partner again lift the weight for you. Repeat for a total of 2-3 negative reps. Although you need a spotter when doing negative reps on most exercises, you can perform them when training alone by doing unilateral moves (similar to forced reps), using your non-working arm or leg to assist through the positive rep.
Negative reps work best at the end of sets of 10 or fewer reps. Lighter-weight high-rep sets not only make the negatives too easy but also don’t offer sufficient mechanical stimulus to promote muscle growth.
Prescription:
Perform 2-3 negative reps on the last 1-2 sets of 2-3 exercises per workout.
Tip:
Negatives work best with barbells and machines Dumbells are typically too unwidely for a spotter to handle effectively.
Negative-Reps Chest Workout
5 Partial Reps
 When you reach failure on the last rep of an exercise, it’s because you can’t move the weight past your sticking point. Your sticking point is usually only a small portion of your range of motion (ROM), and chances are the muscles you use in the rest of the ROM aren’t fatigued. So to continue past failure, shorten your ROM to avoid your sticking point and proceed with partial reps.
On lat pulldowns, for example, you’re weakest when the bar is close to your chest. So when you can no longer touch the bar to your upper pecs, simply pull the bar as far down as you can. Your ROM will get shorter on each rep until eventually you can’t move the bar more than a few inches. That’s when you’ve reached total muscle failure.
Prescription:
Use partial reps on the last 1-2 sets of most exercises.
Tip:
If you use partial reps on exercises such as bench presses or squats, have a spotter on hand not to assist you but to make sure you can rack the bar.
Partial-Reps Back Workout

6 Rest-Pause
For rest-pauses simply go to failure, rest briefly, then continue the set. Your muscles fatigue because they can no longer produce the energy to contract. A short rest of just 15 seconds will allow your muscles to replenish enough energy to eke out a few more reps without having to decrease the weight. Using squats as an example, perform a set to failure. Rack the bar and rest 15 seconds, then rep out to failure again. Do this 2-3 times per rest-pause set any more than that and you won’t be able to recover enough in 15 seconds to squeeze out even one more rep.
Much like partial reps, you can do rest-pauses on any exercise. With moves such as bench presses and squats, however, you should have a spotter and engage the safety bars in case you underestimate your fatigue and need help reracking the bar.
Prescription:
Do 2-3 rest-pauses on the last 1-2 sets of each exercise.
Rest-Pause Leg Workout

Tip:
Don’t rest too long within a rest-pause set. If you rest 30 seconds or more, you’re essentially doing straight sets.
Use It, Don’t Abuse It
 There’s one caveat regarding these techniques: You should have at least six months of consistent training under your belt before using them in your routine. Without adequate lifting experience, these high-intensity tactics can be counterproductive. Those with gym experience have a couple of options for incorporating these tools. The first is to rotate them continuously within your workouts. For example, use drop sets in one routine, negative reps in the next, partial reps in the workout after that and so on.
The second way is to stick with one technique for 3-4 weeks, then swap it out for another for the next 3-4 weeks. Don’t bombard your program with multiple techniques every workout or you’ll be asking to suffer overtraining.
Author: Jim Stoppani
References:
http://www.muscleandfitness.com/
http://www.flexonline.com/
COPYRIGHT 2011 Weider Publications
COPYRIGHT 2011 Gale Group